Frequently Asked Question
Network Settings Change
There are many ways to access network settings in a Windows computer. We will first explain the easy way to access the settings and then different things you can do with the settings.
Open Network and Internet Settings
Press and hold the windows key and X key to open the power user menu. Click on the “Control Panel” to see the screen like below and then navigate to “Network and Internet” option.

You will see the following options:
- Network Sharing Center
- HomeGroup
- Internet Options
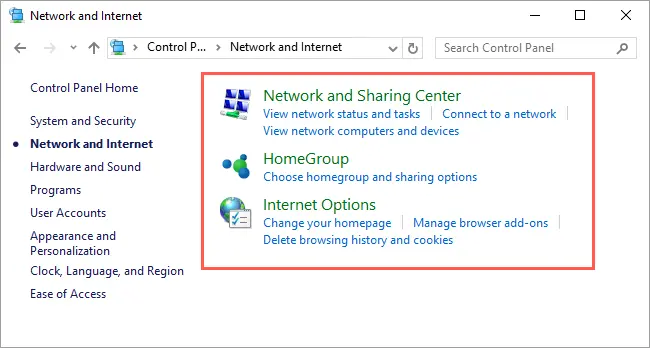
Basically you need to play around the network sharing center and internet options. Here we are not going to discuss about homegroup sharing.
How to Change LAN / Wi-Fi Settings?
Clicking on the “Internet Options” link will take you to the new “Internet Properties” window. Go to the “Connections” tab and click on the “LAN settings” button.

You will see the “Local Area Network (LAN) Settings” popup window. Here you can disable or enable automatic configuration, enter configuration script and add proxy server. You may need to disable all these checkboxes during troubleshooting of most of the network errors.
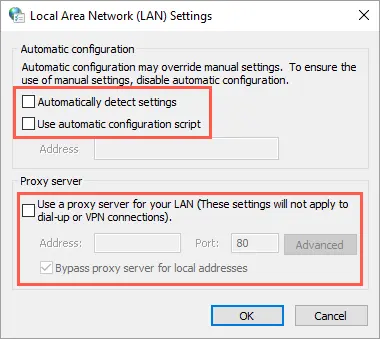
Note: Remember there are many tabs under the “Internet Properties” dialog box. You can modify these settings to control the browser behavior. For example, you can block the popups under “Privacy” tab.
Change TCP/IP Protocol Properties
Go back to your “Control Panel > Network and Internet” section. Now that click on the “Network Sharing Center” link to see the active networks connected from your computer.
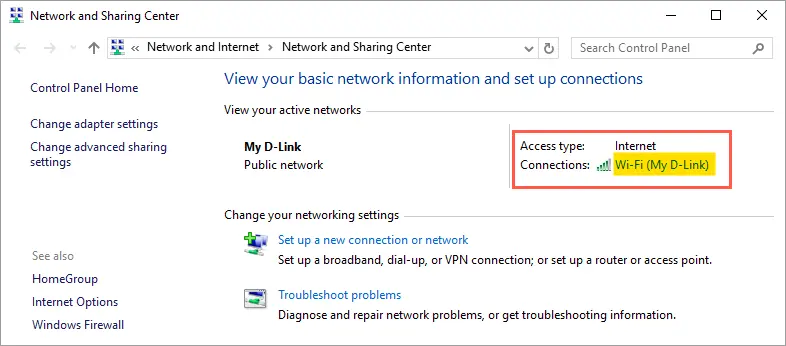
Click on the active connection to open the properties window of the currently connected network. Based on the active Wi-Fi / LAN connection, you will see the Wi-Fi / LAN status dialog box.

Click on the “Properties” button to see “Wi-Fi Properties” popup window. Select “Internet Protocol Version 4 (TCP/IPv4)” option and then click on the “Properties” button again.
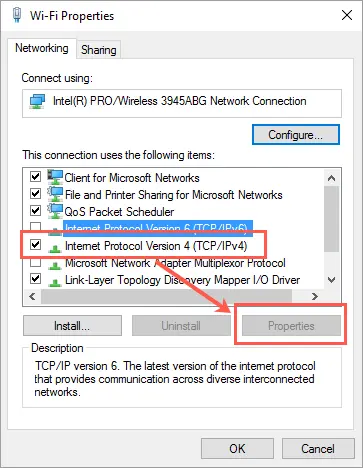
You will see the TCP/IPv4 properties window like below.

If the IP of the laptop is not in the 192.168.68. range then manually set the following as an example:
- IP address: 192.168.68.10
- subnet mask: 255.255.255.0
- default gateway: 192.168.68.1
- Prefered DNS: 192.168.68.1
- Alternate DNS: add the current router DNS for additional Internet access